
The basics for getting Kun Li setup.
Kun Li requires Jekyll 3.0. Make sure to run bundle update if you aren’t on the latest version or bundle install if this is your first time installing it.
If you are creating a new Jekyll site using Kun Li following these steps:
jekyll-theme-skinny-bones-master to something meaningful ie: new-sitebundle install to install all Jekyll and all dependencies._config.yml, add navigation, and add posts/pages. Full details below.If you want to use Kun Li with an existing Jekyll site follow these steps:
jekyll-theme-skinny-bones-master to something meaningful ie: new-sitebundle install to install all Jekyll and all dependencies.config.yml, add navigation links. Full details below.The preferred method for running Jekyll is with bundle exec, but if you’re willing to deal with gem conflicts feel free to go cowboy with a jekyll build or jekyll serve.
In some cases, running executables without bundle exec may work, if the executable happens to be installed in your system and does not pull in any gems that conflict with your bundle.
However, this is unreliable and is the source of considerable pain. Even if it looks like it works, it may not work in the future or on another machine.
bundle exec jekyll build

bundle exec jekyll serve
How Kun Li is organized and what the various files are. All posts, layouts, includes, stylesheets, assets, and whatever else is grouped nicely under the root folder. The compiled Jekyll site outputs to _site/.
jekyll-theme-skinny-bones-master
├── _site                               # compiled site ready to deploy
├── _images                             # unoptimized images
├── _includes                           # reusable blocks for _layouts
├── _layouts
|    ├── archive.html                   # archive listing of a group of posts or collection
|    ├── article.html                   # articles, blog posts, text heavy material layout
|    ├── default.html                   # base
|    ├── research.html                   # base
|    ├── news.html                   # base
|    ├── collaborators.html
|    ├── recruitment.html
|    ├── team_building.html
|    ├── home.html                      # home page
|    └── media.html                     # portfolio, work, media layout
├── _posts                              # posts grouped by category for sanity
├── _sass
|   ├── vendor
|   |   ├── bourbon                     # Bourbon mixin library
|   |   └── neat                        # Neat grid library
|   ├── _animations.scss                # CSS3 animations
|   ├── _badges.scss                    # small badges
|   ├── _bullets.scss                   # visual bullets
|   ├── _buttons.scss                   # buttons
|   ├── _grid-settings.scss             # Neat settings
|   ├── _helpers.scss                   # site wide helper classes
|   ├── _layout.scss                    # structure and placement, the bulk of the design
|   ├── _mixins.scss                    # custom mixins
|   ├── _notices.scss                   # notice blocks
|   ├── _syntax.scss                    # Pygments.rb syntax highlighting
|   ├── _reset.scss                     # normalize and reset elements
|   ├── _variables.scss                 # global colors and fonts
|   ├── css
|   └── main.scss                       # loads all Sass partials
├── fonts                               # webfonts
├── images                              # images
├── js
|   ├── plugins                         # jQuery plugins
|   ├── vendor                          # vendor scripts that don't get combined with the rest
|   ├── _main.js                        # site scripts and plugin settings go here
|   └── main.min.js                     # concatenated and minified site scripts
├── apple-touch-icon-precomposed.png    # 152x152 px for iOS
├── favicon.ico                      # 32x32 px for browsers
└── index.md                            # homepage content
└── _config.yml                         # Jekyll settings
A quick checklist of the files you’ll want to edit to get up and running.
_config.yml is your friend. Open it up and personalize it. Most variables are self explanatory but here’s an explanation of each anyways:
The title of your site… shocker!
Example title: Kun Li
A description of your site. Used in page meta.
Example description: "A lightweight site starter for Jekyll"
Site logo, used mostly as a default image that appears on Twitter Cards if a large feature image isn’t present. If used place a square image around 120 x 120 pixels in /images/.
Example logo: 120x120.gif
Default teaser image used for posts and pages that do not have one assigned. This image shows up in the archive grid module. It can have whatever dimensions you want, I’ve found that an image with rectangular proportions work nicely. Like the site logo, place in /images/.
Example teaser: 400x250.gif
Used to generate absolute URLs in sitemap.xml, atom.xml, and for generating canonical URLs in <head>. When developing locally either comment this out or use something like http://localhost:4000 so all assets load properly. Don’t include a trailing /.
Examples:
url: https://mmistakes.github.io/jekyll-theme-skinny-bones
url: http://localhost:4000
url: https://yourdomain.com
url:
The default is en for English. site.locale is used to apply localized text for a few key strings.
The theme supports localized text through a data file for the following text strings:
To update or add other translations edit _data/messages.yml and then set the appropriate locale in _config.yml. For example to switch from English to German replace locale: en with locale: de or locale: de_DE.
Feel free to submit a pull request for additional languages and any other parts of the theme that could be localized.
To set what links appear in the top navigation edit _data/navigation.yml. Use the following format to set the URL, title, teaser image/description (used in off-canvas menu) of each link:
- title: Portfolio
  url: /portfolio/
  excerpt: "Things I’ve designed, illustrated, developed, coded, and whatever."
  image: 300x200.gif

- title: Made Mistakes
  url: http://mademistakes.com
To set what links appear in the footer edit _data/footer.yml. Use the following format for each link:
- title: Subscribe
  url: /subscribe/

- title: External Page
  url: http://mademistakes.com
Create new MarkDown (.md) files in _posts. If you aren’t using categories to organize your posts then don’t worry about this next bit. I like to organize all my posts by a single category and file them under sub-directories beneath _posts. For example if I have post named 2014-06-01-new-post.md and it has a category of foo it will have the following path:
_posts/foo/2014-06-01-new-post.md
Which when processed by jekyll would have a URL of domain.com/foo/new-post/.
The only YAML Front Matter required for posts and pages are title and layout, everything else is optional.
Add categories: and assign a single category name for added organization. The theme makes the assumption that posts will only be assigned to one category at a time. You can certainly assign multiple categories but unexpected things may happen with the permalink structure.
I like to group posts by general categories like articles, portfolio, whatever, and using tags to more specific classifications.
If you assign a modified date to a post or page it will override the published date and appear in the page footer with the following format Updated August 27, 2014. It’s also used as metadata to give search engines another piece of info about your content.
I like to use this Sublime Text plugin to insert the current date after I’ve updated a post, but you can do it manually to. It should follow the same date format used by Jekyll when naming posts: YYYY-MM-DD.
modified: 2014-08-27
modified: 2014-08-27T11:57:41-04:00 # more verbose, also acceptable
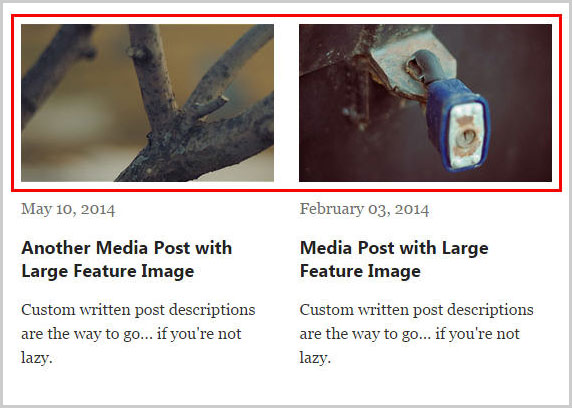
Here you can define the various images assigned to posts and pages.
A good rule of thumb is to keep feature images nice and wide so you don’t push the body text too far down. An image cropped around around 1024 x 256 pixels will keep file size down with an acceptable resolution for most devices without bloating your site. If you want to level-up your site I’d suggest looking at the Jekyll Picture Tag plugin1 to make them responsive.
The post and page layouts make the assumption that the feature images live in the images/ folder. To add a feature image to a post or page just include the filename in the front matter like so.
image:
  feature: feature-image-filename.jpg
To add attribution to a feature image use the following YAML front matter on posts or pages. Image credits appear directly below the feature image with a link back to the original source (if supplied).
image:
  feature: feature-image-filename.jpg
  credit: Michael Rose #name of the person or site you want to credit
  creditlink: https://mademistakes.com #url to their site or licensing
Teaser images appear on archive pages in the post grid and are also used in the off-canvas menu. If you don’t assign a teaser image for a specific post or page, the default one will be used. The default image can be set in _config.yml under site wide configuration teaser: 400x250.gif. Teaser images should be roughly 400 x 250 pixels to scale comfortably across screen sizes.
Similar to feature images you don’t want to go crazy and use large high resolution assets for your teasers. Keep in mind performance and balance accordingly.
To assign a teaser image on a post use the following YAML:
image:
  teaser: 400x250.gif
  feature: feature-image-filename.jpg
  credit: Michael Rose #name of the person or site you want to credit
  creditlink: https://mademistakes.com #url to their site or licensing
For longer posts you may find it beneficial to include a table of contents menu. Add {% include toc.html %} where you’d like the TOC to appear and Kramdown will take care of the rest by converting all headlines to list of links.
If you need to alter the Overview headline text that appears at the top of the list, you can do so by editing _data/messages.yml.
To use Google Ads on your site create a Google AdSense account and then add your ad-client and ad-slot variables to _config.yml. To show ads on a post/page add ads: true to the YAML Front Matter.
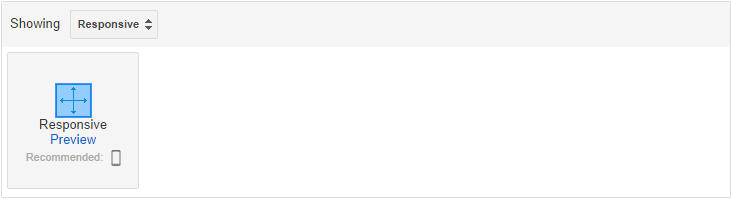
Select responsive for ad type, allowing it to display at various sizes. If you’d like to use a different ad network just edit the appropriate HTML and JavaScript found in _includes/advertising.html.
Create a Disqus account and change disqus-shortname in _config.yml to the Disqus shortname you just setup. To enable commenting on a post, add the following to its YAML Front Matter:
comments: true
Social sharing links for Twitter, Facebook, and Google+ are included on posts/pages using the article and media layouts by default. To hide them on specific posts or pages add share: false to the YAML Front Matter. If you’d like to use different social networks modify _includes/share-this.html to your liking. Icons are set using Font Awesome.

Maintaining pretty URLs for your site can be handled in two ways when creating new pages.
Place a .md file at the root level and add the appropriate permalink to the YAML Front Matter. For example if you want your About page to live at domain.com/about/ create a file named /about.md and add permalink: /about/ to its YAML Front Matter.
Or you can create /about/index.md and omit the YAML permalink. Up to you how you’d like to organize your pages.
You can also group pages in a _pages folder similiar to _posts if you follow this short guide.
Create an archive page for each category or section of your site that you want to list a collection of posts. On these pages you’ll want to use the archive layout and use a variation of the following for the page’s content changing foo to the appropriate category you want to list posts from.
<div class="tiles">
{% for post in site.categories.foo %}
  {% include post-grid.html %}
{% endfor %}
</div><!-- /.tiles -->
If you’d prefer a less visual list of posts use {% include post-list.html %} instead of the post-grid.html _include.
Posts are stored in the _posts directory and named according to the YEAR-MONTH-DAY-title.MARKUP format as per the usual.
To streamline the creation of posts and pages, Jekyll::Compose and Octopress are great plugins you can install to automate this process.
Found a bug or aren’t quite sure how something works? By all means submit an issue on GitHub. For straight forward bug fixes feel free to submit pull requests.
Kun Li was built predominately as a framework for my own site. My intention was never to make it all things for all people. So please keep that in mind before submitting new features or enhancements. If you’ve used any of my Jekyll themes I think it’s pretty clear what I like and what I try to avoid. When in doubt ask before wasting your time on a feature that won’t get merged in.
This theme is free and open source software, distributed under the MIT License. So feel free to use this Jekyll theme on your site without linking back to me or including a disclaimer.
If you’re using GitHub Pages to host your site be aware that plugins are disabled. You’ll need to build your site locally and then manually deploy if you want to use this sweet plugin. ↩